Unlike traditional weddings, there’s no manual for planning a hiking elopement — not to mention, the logistics are completely different. As someone who has helped numerous couples create a day that speaks to their soul, I’ve put together this complete guide to help walk you through each step of the process in creating your own.
Broken up into ten digestible sections, I’ll cover the most important aspects of a hiking elopement, from how to choose a location and what to bring with you, all the way to important safety precautions and planning your timeline. Read from start to finish, jump around as you please, take notes, bookmark it for future reference, or share it with a friend — whatever your style, my hope is that this information will be helpful to you in both small and big ways!
TABLE OF CONTENTS
- Leaving No Trace
- Location, Location, Location!
- The Ten Essentials
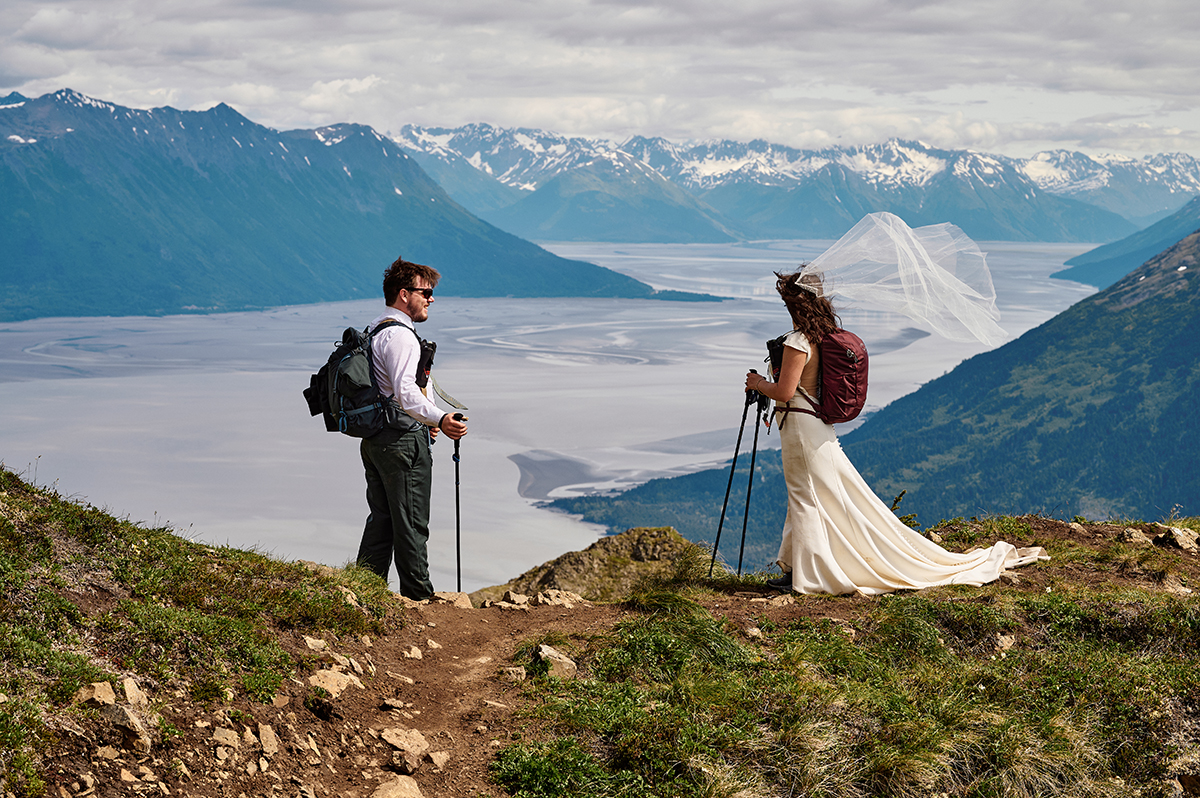
- Clothing & Layers
- Footwear & Accessories
- Choosing the Right Backpack
- Gear Recommendations
- Packing Your Bag
- Planning for Guests
- Itinerary & Timeline
LEAVING NO TRACE
There are seven guiding principles in Leave No Trace, and the keyword there is “guiding”. These are not hard and fast rules, nor is it meant to act as a gatekeeper between people and the outdoors — rather, think of these principles as a way for us to be more mindful of our impact on the land while we’re out there. Nobody is perfect and nobody follows these 100% “correctly”, 100% of the time. I’ll touch on each one briefly, but for all of my booking couples, rest assured that you’ll receive a full-fledged guide on Leaving No Trace for your elopement (and why it matters), as well as how this can all be included in your decision-making and your day!
© 1999 by the Leave No Trace Center for Outdoor Ethics — www.lnt.org
- Plan Ahead and Prepare
The first principle, and arguably one of the more important ones, is to plan ahead and prepare. I am definitely here to help with almost all of the planning, but you’ll need to do some leg work in the preparation department, and that’s exactly what I’ll be covering in the rest of this article! From knowing when and where you will be going, to what to bring and how to bring it, you’ll be ready for a fun, stress-free, and safe elopement experience. - Travel and Camp on Durable Surfaces
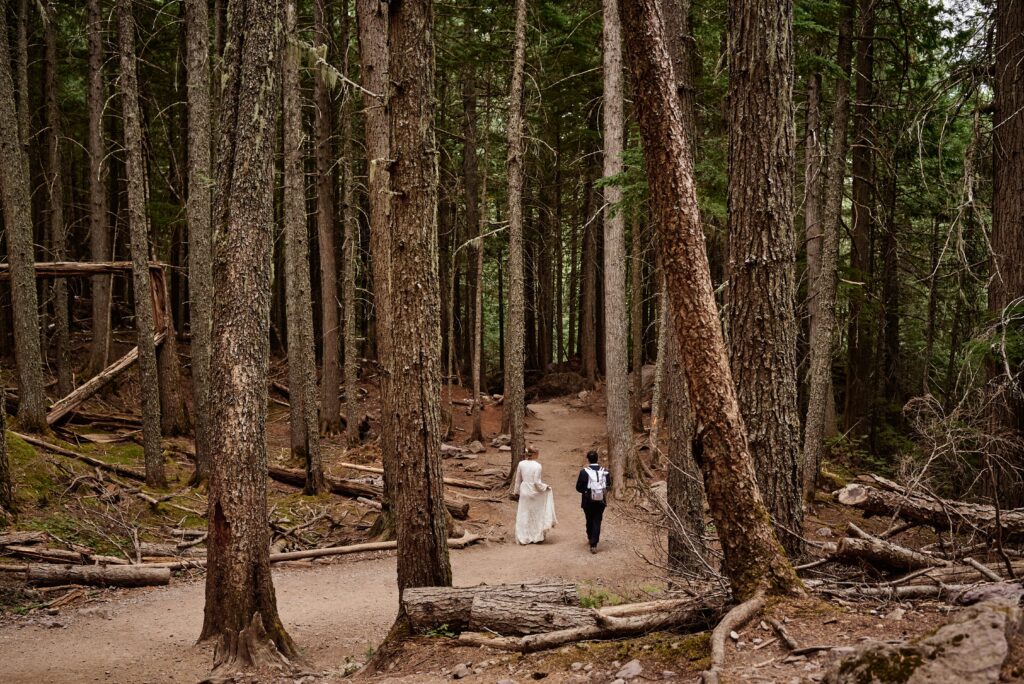
For the most part, this basically means “stay on the trail”. Don’t wander off into delicate fields of wildflowers, do your best not to trample vegetation, and stick to the trail even when it’s muddy! Off-trail travel can be feasible in various locations, but only if there are durable surfaces to walk on. - Dispose of Waste Properly
This isn’t anyone’s favorite topic, but it’s an important one! If you’re planning a hiking elopement, you won’t be near any facilities (save for the trailhead) and knowing how to “do your business” outdoors is really important! Have a proper toiletry kit and educate yourself on the best practices for the area you will be eloping in for when nature calls. - Leave What You Find
I know it can be super tempting to take little mementos with you, but that’s why I am here to document your day! If you see something you’d like to remember, you can always ask me to take photos. One way I like to explain this to my couples is, what if everyone who came here took only one flower, one branch, or one rock? Pretty quickly, there’d be nothing left. We have to remember that this is an entire ecosystem that both wildlife and Native peoples rely on. We are already on stolen land, so let’s not steal more of it. - Minimize Campfire Impacts
Not everyone will choose to have a campfire, and there are some fun ways to add lighting to your evening without starting one! If you choose to go the fire route, be sure you know where and how you can safely and legally enjoy it on your day. Always drown your fire with plenty of water and keep to designated fire rings to minimize the impacts. Keep in mind that your location, current conditions, wildfires, and fire bans all play a part in whether or not you can do this. - Respect Wildlife
No matter where you choose to elope, if it is outdoors, you will likely encounter some wildlife. Keep a safe distance, don’t outrightly bother them, and be sure to keep your food and scented items properly stored while not enjoying them. Especially out here in the west, I recommend my couples carry bear spray in a readily accessible location on their body and educate yourself on how and when to use it. - Be Considerate of Other Visitors
Chances are good that you won’t be the only one around during your elopement, most especially if you’re opting for a day at a popular destination, such as a National Park or frequented trail. “Being considerate”, in this context, mostly asks that you not hog a viewpoint or specific location for too long, or to be too loud — remember that they are here to experience and enjoy this location, too!

LOCATION, LOCATION, LOCATION
First up on the “Plan Ahead and Prepare” docket is location. Knowing this will determine most of the rest of your planning, such as what season/time of year you should go and what kind of clothing and gear you should bring. But with so many options (literally anywhere in the world!), how do you decide? There are many different approaches on how to choose an elopement location, but the main things to keep in mind for a hiking elopement are what kind of scenery you envision being in, the difficulty and length of the trail, and what kind of weather and climate you would like to experience. In these next few sections, I’ll talk about the pros and cons that come along with a few of the more popular, and sometimes “extreme”, ends of the spectrum.
- Hiking in the Summer
Summer is a popular time to get married for myriad reasons — the sun is out more often than not, the weather is generally pleasant for being outside, wildflowers are in bloom, the days are longer, and a lot of higher altitude locations are much more easily accessible. All excellent reasons to have an elopement this time of year! But remember to keep in mind that it is also the busiest time for most outdoor spaces, so if privacy is at the top of your priority list, you’ll need to dig deep to find a place that fits that bill. Wildfires and smoke can also be a problematic factor for many locations out west, so remember to always have backup plans that you love just as much as your first choice! - Hiking in the Winter
Most couples don’t think to get married outside during the winter because it’s cold, snowy, and it gets dark earlier in the day, and I feel you on that. But it can be so incredibly magical, too. There are far fewer folks out hiking on the trails so you’re almost guaranteed to have a more secluded experience in comparison to the summer months (especially if you opt to go somewhere that requires crampons, snowshoes, or even skis!). And, even though it gets dark out earlier, that can make for some amazing star photos. Crisp, cold air on a clear night is the perfect recipe for those, and it’s a great excuse to snuggle up next to a fire under a blanket with your love, so don’t rule out winter being a bummer just yet! - Hiking in the Mountains
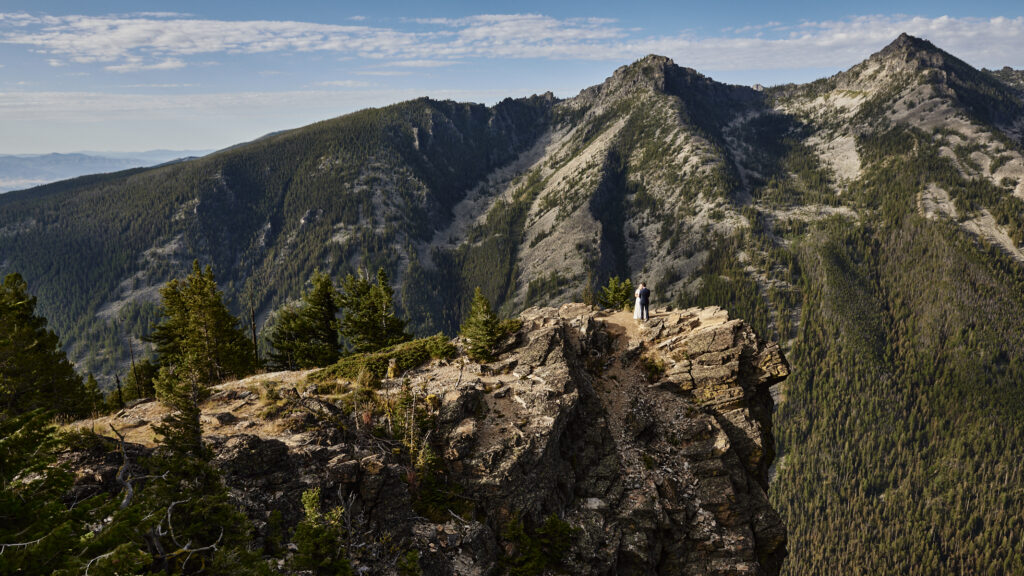
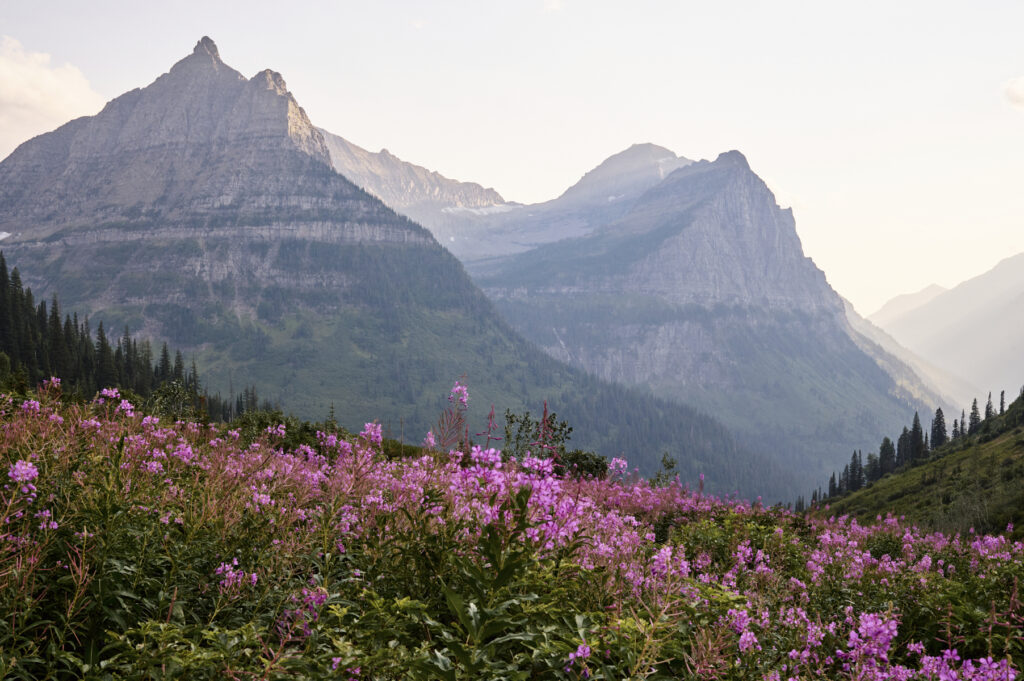
Mountains are also super popular, and also for good reason. They are simply majestic. They add a certain drama to your images and enhance the overall enjoyment of your elopement by basking in their presence. Getting up early to hike by headlamp for a sunrise ceremony with the morning alpenglow is an out-of-this-world, amazing experience! Plan accordingly because they can also be moody and unpredictable, with weather fronts coming in out of nowhere — afternoon rain/thunderstorms are a common occurrence. If you’re used to lower elevations, prepare for the possibility of altitude sickness and do your best to acclimate ahead of your big day. - Hiking in the Desert
You’ve probably seen a plethora of photos from couples eloping in the desert. The scenery is severe and dramatic and there is just so much mystery, adventure, and exploration to be had in this environment, especially if you’ve never been before. And if you’re wanting to get married in the winter without all the snow and sub-zero temperatures, this is a great place to do so! However, keep in mind that the temperature in desert climates can vary wildly and sun exposure can be a major concern, especially when it’s hot. With precious few water sources, you’ll also need to pack in a lot of water and be okay with filtering from a muddy source in case of emergencies.
THE TEN ESSENTIALS
Planning and preparing for a hiking elopement includes some gear and items that will keep you happy, healthy, and safe — and that’s exactly what The Ten Essentials will do for you. It is a comprehensive short list of the basic items you should always take with you into the outdoors, for day hikes, weekend backpacking trips and, yes, even getting married! Keep in mind that these are just the essentials for safety purposes and do not include the wedding-specific items you would want to take with you for your elopement. There are some creative ways for including the Ten Essentials in your elopement, but we’ll cover the basics for now.
- Navigation
Just as it sounds, you would obviously want some way to navigate your way on the trail. Even if you’re confident you won’t get lost (you never know, it’s happened to me!), just knowing where you are and how far you have to go is helpful. A map and compass is most common, though for more difficult, obscure, or “way back there” backcountry hikes, having a GPS device with emergency SOS capabilities is recommended. - Sun Protection
Sunscreen and SPF lip balms are the most common forms of sun protection, but don’t forget that clothing acts as protection from the harmful rays, too! Hats, sun gloves, long sleeve shirts, and pants all work just as well (if not better). - Insulation
Packing the appropriate clothing and layers (which I go into more detail in the next section) is super important to making sure you stay healthy and safe. They keep your body’s temperature well regulated, be it in hot or cold environments, and protect you from the elements, like rain, wind, and sun. - Illumination
Most hiking elopements will require a longer than average day, so it’s best to always be prepared to hike in the dark (a guarantee if you’re doing anything around sunrise or sunset). Headlamps are best since they leave your hands free for things like trekking poles or snacks, but flashlights do the trick as well! - First Aid/Safety
It’s best practice to pack a first aid kit that would cover the number of people in your group and has supplies for the types of injuries or situations you’re most likely to encounter. For instance, you wouldn’t need to bring a snake bite kit if you’re snowshoeing in the winter but you would want to bring hand warmers! - Fire
No, you don’t need to bring actual, live fire as if it were an Indian Jones movie, just something to make a fire, if need be in an emergency situation. Matches and lighters will do the trick, though stormproof/windproof is best. - Shelter
Unless you’re going backpacking, this doesn’t have to be anything too terribly fancy, as any form of shelter is better than none if circumstances called for it. A simple way to achieve this without packing in pounds of gear is a length of paracord that you can tie between trees and a mylar emergency blanket to act as an A-Frame “tent” over top it, or even a waterproof hammock that you can huddle under. This will protect you from the elements well enough in a pinch. - Nutrition
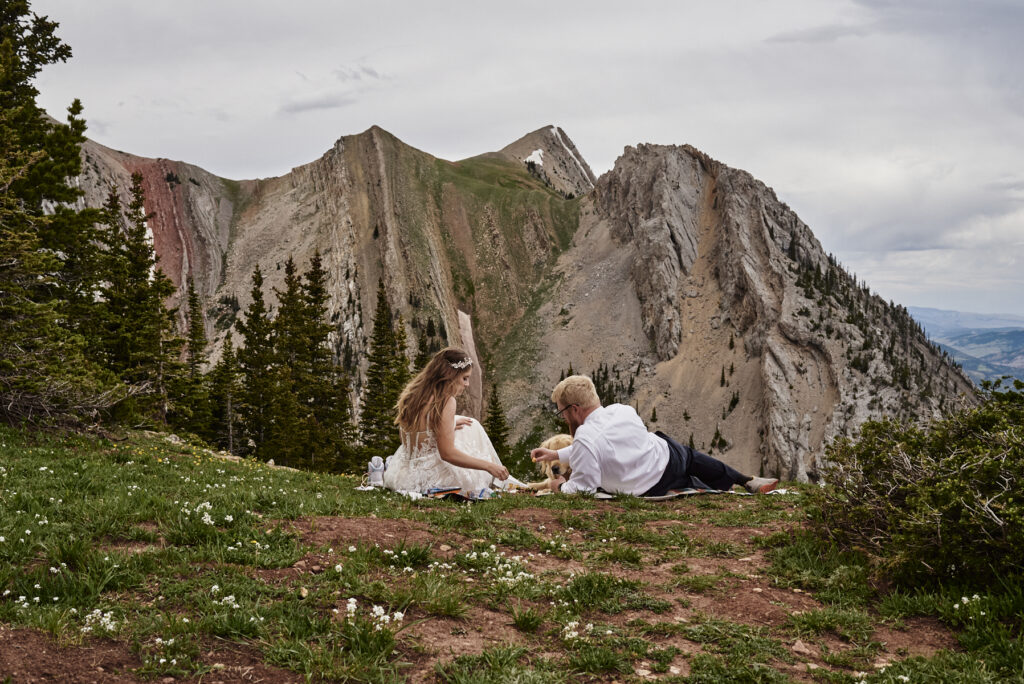
Snacks, snacks, and more snacks! Perhaps even a delicious picnic meal for your hiking destination or celebratory dish to share. Staying well-fed on your hike will keep you energized, healthy, and happy, so pack what you think you’ll need plus a little extra. - Hydration
Staying well-hydrated is equally as important as being well-fed. Depending on where you are eloping, you might need to pack in all of your water, or perhaps you’ll have access to water sources along the way. Either way, you should always have a backup plan in the form of a filtration system, purifying tablets, etc.! - Repair & Tools
This sounds more heavy duty than it needs to be, but having a simple repair kit for various gear and items is important. A small multitool can go a long way, tenacious tape can seal up a hole in a rain jacket, and a mini sewing kit can repair torn clothing.
CLOTHING & LAYERS
Your clothing is an incredibly important part of the picture when it comes to being able to enjoy your day, uninhibited. One of the first questions to ask yourself, after you’ve made the decisions of when and where you will be eloping, is whether you would like to hike in your wedding attire or change into it once you’ve reached your destination. This is crucial when considering the type of outfit(s) you’ll want to purchase for yourself as you’ll definitely want to be able to breathe and move in whatever it is you’re wearing. But how do you choose?
- Choosing Your Wedding Attire
Whether you’re hiking in your wedding attire or not, you’ll still want to be able to move in it, unrestricted. Chances are, you’ll likely want to walk/hike around your destination a little bit, sit down on a blanket, crouch low to see something neat, step up onto a rock for a better view, etc. Outfits that are too form-fitting can be restrictive with these types of movement, especially if you need to add an underlayer for colder weather, so be sure you’re “testing” them appropriately in the dressing room while you’re trying them on! If you choose to wear a dress or skirt, is it lightweight enough to walk around or hike in? Is it flowy enough for air movement and maybe some epic windy photos? If you choose to wear a suit or pants of any type, can you crouch, sit, and lift your legs up without any hindrance?
Likewise, keep in mind how breathable and durable the fabric and materials are. No matter the season, hot or cold, you don’t want your body to suffocate in your lovely get-up, nor do you want it to tear super easily if you walk too close to a thorny bramble (unless you’re okay with that happening!). Striking a balance can be hard to find in an outfit for an outdoor, adventure elopement, but so long as you are comfortable, feel great, and are ready to take on the dirt and/or mud, there’s no way you’ll go wrong! - Choosing Your Hiking Attire
If you’re wanting a hiking elopement, chances are pretty good that you already know what you like to hike in and have the appropriate attire for doing so. If not, make sure you plan far enough in advance so you can test some things out for yourself and talk to some reputable outdoor retailers to aid you in your search. Of course, for all my booking couples, I’m a fountain of knowledge on this subject and would be more than happy to help you as well! Either which way, keep in mind that you will be photographed in these outfits, so make sure it’s something you feel comfortable seeing on yourself in your wedding photos! Maybe you’d like to wear something more “themed” to your elopement, or colors that are brighter than usual so they stand out in your images, or more earthy, muted tones that would suit the landscape. Whatever your choice may be, all that matters is that you are comfortable and feel amazing in what you’re wearing! - Differences in Materials
There are SO many choices when it comes to outdoor apparel and it can be downright intimidating knowing which will be best for you, your location, and the potential weather. I won’t go into the super detailed specifics, like polyester vs. nylon, but I’ll cover the most broadly used definitions: Wool vs. Synthetic for clothing, and Down vs. Synthetic for jackets.
- Wool vs. Synthetic
There are definitely pros and cons to each of these options and, in my experience, it mostly boils down to personal preference over one necessarily being “better” than the other for various situations. Wool is, naturally, very warm. Especially if you go with a merino variety, it’s a bit more lightweight, softer, and not nearly as itchy (if at all) and doesn’t hold odor like synthetic materials do, though it does get pricey pretty quick. Wool also stays warmer when wet than synthetic does, but it holds up to 30% of its weight in moisture and can take a little longer to dry. This can be a concern in cold situations where you are stopping often, as you will cool down more rapidly. Synthetic is still very warm, wicks moisture well, dries quickly, and often has a cheaper price tag, but most definitely holds odor much more noticeably. - Down vs. Synthetic
Down is, hands down, the best warmth to weight ratio you can get on the market. It is super warm, super light, and packs down super small, but also comes with a super high price tag. Down simply isn’t feasible for everyone and, honestly, it doesn’t always make sense for every situation. If you will be eloping in a location that is known for its damp, wet, and/or rainy environment, a down jacket might not be your best option. Down requires its “loft” capability (fluffiness of the feathers, essentially) in order to capture and retain heat to keep your body warm — as soon as it gets wet, however, those feathery fibers stick together and aren’t able to do so anymore, making it much more difficult to stay warm, especially now that you are wet. Synthetic, on the other hand, doesn’t have this problem (aside from just being wet, which is obviously never good if you’re cold, regardless). But, it doesn’t lose much, if any, of its loft so it is able to retain heat better in wet conditions than down can. Synthetic might be a bit heavier than down, nor pack down as small, but they are making great strides in closing these gaps and it also comes with a much cheaper price tag.
- Wool vs. Synthetic
- Layering Options
Cold weather/winter elopements obviously call for some layers. A hat or ear muffs, some gloves or mittens, perhaps a scarf, definitely a jacket (or two!), good socks, and maybe some fleece lined leggings or thermal underlayers to keep you warm beneath your wedding attire. But you’re getting married in the summer, so you don’t need to worry about layers, right? WRONG! Even in the summer, depending on your location, temperatures can drop drastically and weather can be unpredictable. Bringing along a jacket and a rain layer ensures that you’ll be prepared for anything, rain or shine! Like stated previously, however, make sure it’s something you would enjoy being photographed in!
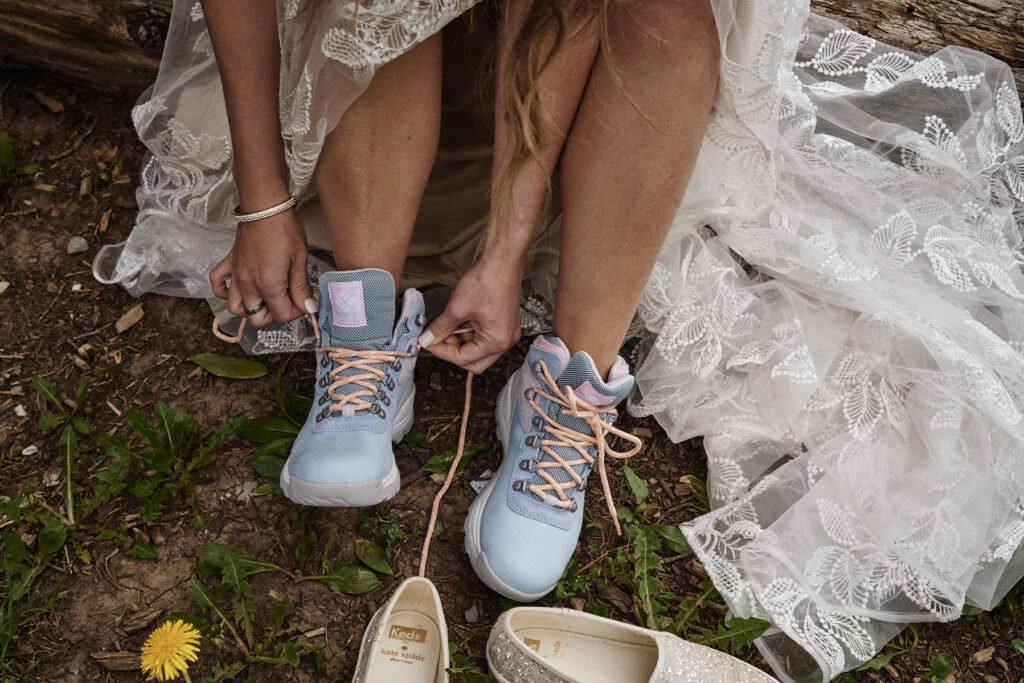
FOOTWEAR & ACCESSORIES
As with most other decisions to be made, this is highly personal. Your feet are unique and not just any ‘ole boot, shoe, or sneaker will do! First, consider what you normally wear to go hiking, particularly for the type of terrain and season you’ll be eloping in, and decide if what you already have will suffice. If not, remember that function over form should be your main factor — nobody likes achy, sore, tired feet! — but that doesn’t mean that you can’t have both. There are plenty of options out there to choose from that will carry you comfortably and look great while doing it.
- Differences in Footwear
We’ve all seen people hiking in every type of shoe — high-top hiking boots, Chacos, trail running sneakers, flip flops, knee-high heeled boots — you name it, someone has probably hiked in it. You don’t need the most expensive, most hardcore hiking boot to go on a hike. If that’s what you usually wear, that’s great! But if you are more comfortable walking around dirt trails in a pair of Chucks, that’s okay, too. And if you’re not entirely sure where to start, then let’s go over the most popular types of footwear for hiking and the pros/cons/best uses for each!
- Hiking Boots
While boots are usually the heaviest option in terms of weight, they are also usually the most durable, protective, and supportive. They tend to have a stiffer tread on the soles that lasts up to three times as long as other shoes and are made for trekking in more difficult, mountainous terrain. If you plan to hike in a lot of water, there are waterproof options available, though these dry much more slowly and are overall less breathable. - Trail Runners
Trail runners are quickly becoming the most popular footwear for hiking and backpacking, and for good reason. They are lightweight, highly breathable, and dry quickly if they get wet (especially on the inside), though they lack the same level of ankle support as high-top boots. And while they won’t last as long as a traditional hiking boot, you can still get 500+ miles on them before needing to be replaced. Most options, since they are designed for running on trails, are made to be used on the same terrain as boots and usually have a waterproof option as well. - Sandals
Another option, though not everyone’s favorite, are hiking sandals. Yes, these do exist! The more well-known brands include Chaco, Keen, and Teva, which are made to be durable and have grippy treads for most types of hiking. Some folks experience blisters with the straps, and they offer very little in the way of protection, so it’s always best to give them a try before committing to them for your hiking elopement. On the plus side, they are the most breathable option (obviously!) and are an excellent water shoe, be it for paddle boarding, creek crossings, or even just wandering around your destination when you don’t want to wear your boots anymore and stretch out your toes.
- Hiking Boots
- Fit + Break In
Full leather boots are less common these days, though they are still an option with some brands. These are the boots that generally need a break in period, so that the leather is able to bend and flex with your movements rather than remaining stiff, causing blisters. For the most part, however, modern boots (which are made with synthetic materials) are good to go right out of the box. That does not mean that your feet don’t need to break in, though! Go for a few shorter hikes and a couple longer ones to see how they fit and feel before settling on one pair over another.
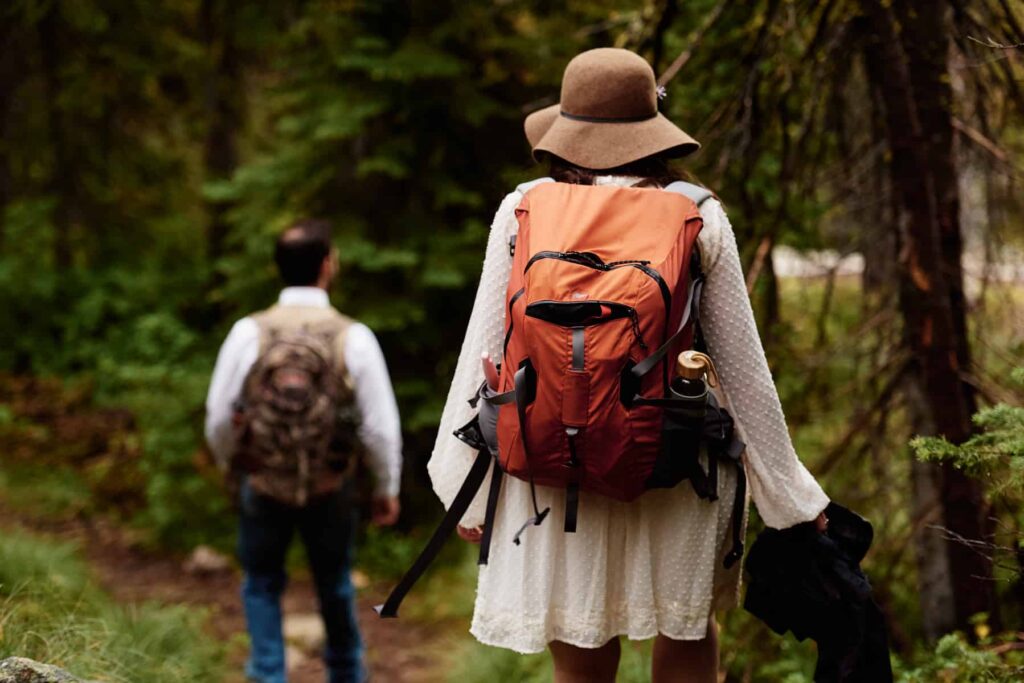
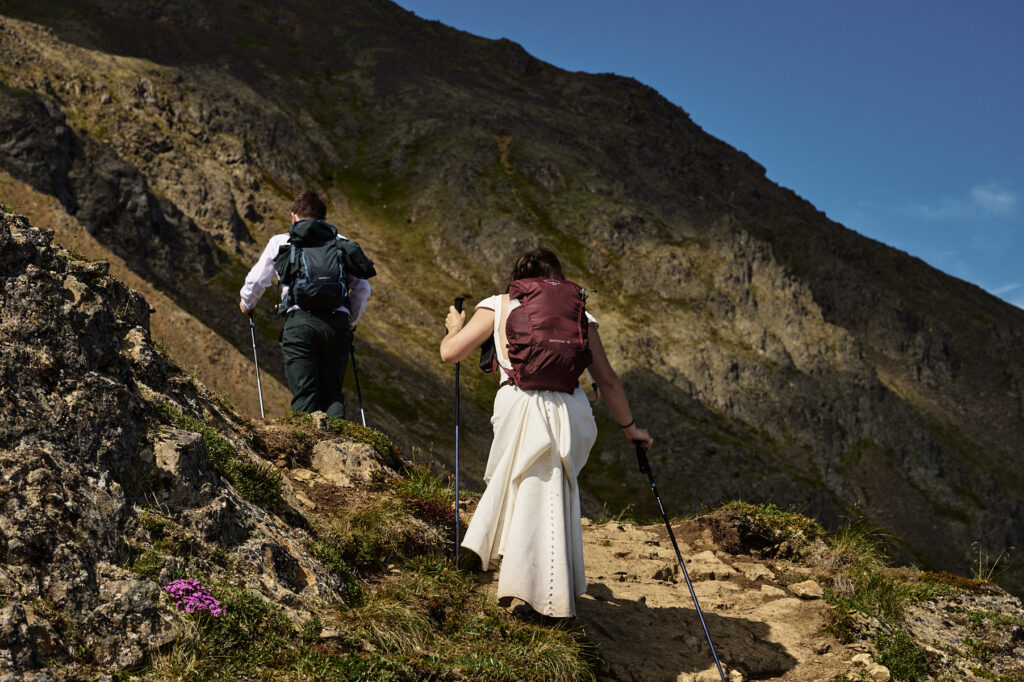
CHOOSING THE RIGHT BACKPACK
Everyone has an opinion on what the best backpack out there is but, truth be told, the best backpack is the one that fits you — an Osprey Aura might work great for your friend but feel horrible on your own body. Making sure you have a backpack that fits your body and carries the weight well will ensure you have a much more comfortable and enjoyable experience, both on your elopement day and any other adventures going forward!
- Frame Sizing
Probably the most common mistake when thinking about backpack frame size is that tall person = size Large and short person = size Small, but this is, more often than not, not the case. Our bodies are not perfectly proportioned; some people have really long legs with very short torsos and vice versa. The most sure-fire way to ensure you are choosing the appropriately sized backpack is to be properly measured and fitted by an expert, usually found in an outdoor retailer. - Capacity
The other consideration with sizing is how big or small of a backpack you need, capacity-wise. Most packs are measured in cubic liters, anywhere from small day hiking packs in the 20-30L range all the way up to extended excursion packs in the 80-100L range. This choice will obviously depend on what and how much you’ll be bringing with you, as well as how long your trip will be. As a reference point, most casual backpackers use roughly 55L to carry all their necessities for a weekend trip. - Comfort + Fit
Once you’ve been measured and have an idea of the liter size you’ll need, it’s time to get fit! And I don’t mean in an exercise way (though that’s important, too). You’ll want to go ahead and try on some different backpacks with weight in them to see how they feel. You want the hip straps to be resting on your iliac crest (the big hip bones you carry a small child on) and tightened snugly around your waist, the shoulder straps hugging your back with no gaps, and most of the weight noticeably on your hips. If you’re feeling too much in your back and shoulders, ask for help with adjusting the straps to see if that fixes the issue. If not, chances are that particular pack is not meant to be. Once you find “the one”, you’ll know it!
GEAR RECOMMENDATIONS
I will preface this section by saying that gear preferences are just that — a preference. As a disclaimer, what I cover here is not the end-all, be-all of gear, nor am I saying that these are the items you need to buy. These are merely suggestions and a starting point for your own research based on what has worked for me in my own use and experience..
- The Essentials
Many of the Ten Essentials have been covered already in that particular section above, but a few that I like to talk about in more detail are headlamps, water filtration, and maps.
- Headlamps
For most hiking situations, you don’t need more than roughly 150 lumens on a headlamp. This is plenty of light to see a good distance in front of you on the trail and get that nice beam of light for star photos. Various models will also have a dimming function that allows you to adjust the luminance more specifically to your liking. An important thing to look at is the waterproof rating, known as IPX — the higher the number (ie: IPX7 or IPX8), the better. Both Petzl and Black Diamond are reputable brands that have inexpensive and durable options that cover all of these features. - Water Filtration
Water filtration/purification is another key essential for hiking elopements. There are many different ways to accomplish this, some faster than others, and some more reliable than others depending on the type of water source. Pump style filters will work with any type of water, but are pretty much necessary for murky/muddy sources. My personal favorite is the MSR MiniWorks EX, as it is fully field-repairable and has fewer moving parts, so it is less likely to break during use. UV filters and tabs will work best with very clean, clear, and sediment free water sources. - Maps + Navigation
And lastly, a topographic map. At the very least, for navigation purposes, you should have one of these. Even if getting lost is not a concern, it’s always nice to be able to see where you are on the trail, what kind of terrain to expect, and how much further you have to go. You should be able to get most any map in a waterproof option, so you can still look at and use it when it’s wet. A compass is useful as well, especially if you know how to use one in conjunction with a map! Most folks these days prefer to use a digital form of navigation, such as a GPS device or phone app.
- Headlamps
- Footwear Accessories
Most footwear accessories are used in the winter, though there is one that I still love for summer hiking, too — gaiters! You can get some lightweight, low-top ones to cover just the ankles of your boots/shoes to keep sand, dirt, and pebbles from getting in there (which can cause discomfort and blisters) and waterproof options work well for wet days.
More commonly, though, the knee-high gaiters are used for winter hiking to keep your pants and boots dry and warm. For icy trails, using a form of crampon is key, such as Kahtoola MicroSpikes (my personal favorite) or YakTrax. For more intense winter hiking where there is a lot of fresh snowfall or no packed trail, snowshoes are highly recommended, as they keep you (mostly) afloat on top of the snow. - Wedding Specific Items
With hiking elopements, you obviously won’t be bringing a ton of extra stuff, if only due to limited capacity in your packs. You’ll want to remember the main items, like your attire, rings or other symbols, and maybe even some cute, personalized vow books, but there are some fun ideas to spice it up a little if you want to! You can make your own “Just Married” or “We Eloped” signs to hang off the back of your packs, or make your own wedding jackets. For additional fun photos, you can consider bringing along sparkling water for a celebratory “pop” or electric lanterns for some evening twilight magic. And, on a more practical note — depending on your comfort level and/or how crowded your location is — you can also bring along a lightweight, collapsible changing booth to get changed/dressed in.
PACKING YOUR BAG
Okay, so now that you have your backpack and all the things you want to bring with you, how the hell do you pack it all in so that it fits? This always feels like a game of Tetris, even for the veterans of the backpacking world, so don’t feel dismayed if you need a few tries to get it just right. There is a tried and true method to help distribute the weight so that your body is able to carry it well without irritation, though feel free to experiment and see what will work for you.
- Proper Weight Distribution
While it can be tempting to just jam everything into your bag all willy nilly, it’s recommended to pack it in a certain way so that your back and shoulders will thank you later. You want the majority of the weight to be carried by your hips, the best load bearing bones in your body. Start by placing the lightest bulky items on the very bottom, such as a puffy jacket, a down blanket, or similar. This will keep the heavier items higher up on your back and closer to your center of gravity so the pack isn’t pulling down on your shoulders.
Next, place the heaviest items in the center of the pack and closest to your spine. This could be a number of different things, like your food, water, or cooking system. To aid in keeping these items as close to the back of the pack as possible, I like to sit on the ground with the pack resting on my knees, straps facing the ground. Gravity will do it’s work in keeping these items closest to where your spine will be!
Stuff some of your remaining lighter items around the outside of the heavier items in the center. This helps push the heavier items closer to the spinal area while utilizing the empty space around it. This could include some lighter layers, like a vest, extra socks, or your wedding attire. Lastly, place the mid-weight items on the very top, such as easy to reach snacks, a toiletry kit, or various accessories you might need.
On another note, the fewer items you have hanging off the outside of your pack, the better the weight distribution will be and the happier your back and shoulders will remain throughout the course of the day. If you must attach items to the outside, try to distribute the weight evenly, stick to some of your lighter items, and keep it as close to your center of gravity as possible. - How to Pack Your Attire
Packing your wedding clothes so that they don’t crease and wrinkle is tricky but not impossible. What I’ve learned over the years is that you need to fold as little as possible and roll as much as you can instead. Folding will obviously create creases which for some clothes can be good (hello, pressed pants!) but isn’t always what you’re going for.
- Pants
For pants, fold in half the long way where you normally would and then loosely roll from the waist down to the ankle, being careful that the pant legs lay as flat as you can get them. - Shirts & Jackets
For shirts and jackets, you can follow a similar method, folding the sleeves along the seam into the middle and then vertically in half along the button-down front, again rolling loosely from the collar down. - Dresses & Skirts
For dresses and skirts, there aren’t usually any natural seam lines to fold along, though the potential crease from a fold or two will often go unnoticed if the design includes enough texture or fabric. Once you’ve decided where would be best to fold once or twice, you can loosely roll the dress/skirt from the top to the bottom. - Shoes
If you’ll be bringing a pair of nice shoes to change into for photos, these fit nicely in the side pockets on the exterior of your pack, one shoe in each. If you’d rather they stay in your pack, they are generally best packed along the center around the heavier items or on top. Placing them in the bottom can squish them and they are generally heavy enough that you don’t want them down there, dragging the weight down on your shoulders.
- Pants
If you’re worried about rain, moisture, or a water bottle leak ruining any part of your outfit, you can place the article(s) of clothing into a dry bag so that it is further protected inside your pack. Even though your outfit is likely one of the lighter items, you do not want to put it at the very bottom of your pack. The heavier items will be sitting on top, pressing down and possibly creating more creases and wrinkles. Your outfit should go either in the center of the pack that surrounds the heaviest items, or on the very top.
- Transporting Flowers & Food
A couple other tricky and highly non-traditional novelties to bring along with you in a backpack is a bouquet of flowers and some specialty food items, though they’re not as tricky to pack as one might think! With a few DIY fixes, you can have fresh florals and fresh food, no matter how long you’ll be hiking.
- Transporting Flowers
While it’s important to choose blooms that are hardy enough to withstand the elements on a hiking elopement, there are a few other tips to keep your florals looking pristine. Start by taking a small, reusable towel and soak it in water. Wring it out so it is damp and wrap it around the stems of your bouquet, securing it in place with a band or tie. Next, place the base of the bouquet, towel and all, into a small dry sack and cinch it tightly around the hardy stems. This will keep your flowers well hydrated so they don’t wilt over the course of the day!
Now for the placement in/on your pack. You have a few options here and this will mostly depend on what features your pack has and where/how you will be packing all of your other items. The three best places for a bouquet are either in a side mesh pocket, the front pocket on the face of the pack, or sticking out the top of the pack with the other items inside helping keep it in place. With each location, you’ll have a variety of straps and/or zippers to help secure your bouquet so it stays put. - Transporting Food
Food can be trickier to pack, depending on what type of foods you’ll be eating and what other accessories you want to bring with you. This can also add up to some significant weight pretty quickly (it usually does!), so you’ll want to plan your containers accordingly to cut down on that as much as possible. If you have them available to you, Beeswrap is great for solid foods like meats and cheeses, and reusable silicone stasher bags can be used for things like nuts, fruits, and vegetables. Hard-sided plastic containers are, despite their bulkiness, more useful for more fragile items, like cake or bread, and are more weight-friendly than their glass counterparts.
- Transporting Flowers
PLANNING FOR GUESTS
If you’re planning a hiking elopement, chances are you will be inviting very few people, if any at all. Many locations’ permits have a limit for allowable group size in various areas, so be sure to choose your location(s) accordingly. You can always break up your day with various hikes as well, if certain guests are less capable of doing something longer and/or more difficult. Planning the ceremony with your loved ones in a more accessible location and then going off and doing something more challenging afterwards, just the two of you, is a great way to get the best of both worlds!
- Hiking with Guests
If you’re wanting to actually hike with your guests, make sure that everyone is on board, willing, and able to do what you are asking of them. Choose a trail and location that would be suitable for the least capable member of your group, and remember to allow a little more buffer room in your timeline to allow for slower hikers, breaks to stop and take in the views and/or snap photos, and just to simply enjoy your time with everyone. You didn’t want the stress of a traditional wedding, so remember not to rush the journey of your day, either! - Preparing Your Guests Ahead of Time
Whether you’re doing a short, easy hike or something more challenging, you’ll want to prepare your guests ahead of time so that they are ready for your big day. Educate them on the location and what kind of trail conditions they can expect that time of year, and be explicit about proper footwear — the last thing you want is someone showing up in fancy shoes, thinking it’s a quick walk on a paved path. Likewise, be sure that everyone knows where they are going, when and where to meet, and how to get there. Many trailheads are out of cell service and WiFi reception, so communicate with everyone well ahead of time, and include pinned maps and written directions.
ITINERARY & TIMELINE
Now comes the fun part, putting it all together! This can seem really intimidating, but if you’ve taken the time to plan out the individual details, it doesn’t have to be as difficult as it seems. Most elopement photographers (like me!) include this as part of their services, so it’s one less thing for you to worry about, but it’s never a bad idea to know the ins and outs of what that could look like and the reasoning behind the timeline so you know what to expect with your own hiking elopement.
- Sunrise or Sunset?
Some people will know the answer to this question right off the bat — you generally know if you’re a morning person or not. Even if you really like the idea of photos or a ceremony at sunrise, if you are adamantly not a morning person, don’t force yourself. Plan your day around knowing how you’ll feel waking up at a certain time, well-rested and ready to fully enjoy your wedding day. - Consider the Lighting
That being said, there are, naturally, better locations/times of day based on where the sun will be and what you’re looking for. If you want an amazing mountain alpenglow sunset to end your day with, you’ll want to look for a location that has west-facing mountains (and east-facing for sunrise). Mid-day is known for its harsh light and shadows, which is not always flattering, so this is a great time to hike, enjoy a picnic lunch in the shade, or even go back to town for a nap if you’re splitting your day between morning and evening. - Build in Extra Time
Things can take longer than expected, especially if you’re inviting guests, and it’s a key elopement staple that you should never feel rushed. Sure, you could plan everything out minute-by-minute but that defeats the purpose of ditching the traditional wedding experience in favor of having a more relaxed timeline that allows for spontaneity. I always recommend over-estimating how much time you think you’ll need for an activity or location so that you don’t have to worry about whether or not you’ll be able to fit it into your schedule. - Plan on Back-Ups
Continuing in the vein of adding wiggle room, be sure to have a few back up plans in place and be prepared to use them. It may be surprising, but the majority of elopements do not go exactly according to Plan A. Whether it’s inclement weather, unexpected road closures, wildfires, or any other circumstance that’s out of our control, you want to be sure you love every option available to you as much as your first choice. Being flexible and “down for whatever” will ensure you have an amazing day, no matter what!
There are many different ways to plan a hiking elopement — getting up early or staying out late (or both!); doing several easy trails or one big, challenging one; inviting friends and family for some, all, or none of your day; bringing along a charcuterie lunch, inflatable raft, or doing some bouldering — this is your wedding so be sure to put your wants and interests first. Remember that your itinerary is best viewed as a rough guideline and to keep yourself open to last minute changes, having to fall back on Plan B, C, D, or coming up with something entirely new and different on the spot.
Elopements, especially ones that involve hiking outdoors, fall completely at the mercy of Mother Nature and embracing the unknown adventure that this entails is a big part of why you are deciding to elope in the first place. With a flexible attitude and open mind, you’ll be sure to enjoy yourselves, rain, snow, or shine!

")
")
")
")
")
")
